Showing posts with label gardening. Show all posts

Wednesday, November 12, 2014

Five Garden Herbs that Outlast Summer

What about that blogging hiatus, huh?

We've been knee-deep in kitchen renovations and it is coming along rather beautifully.  We are in a holding pattern right now waiting for our backsplash tile order to come in so I'm sneaking in a quick post.  But first.. let me share my giddiness.  The gas range finally arrived last weekend - which means no more camping stove cooking!  Three weeks of that was more than I could bear (drama, drama!).

This Samsung NX58H9500WS gas range has a convection oven which was a top priority for us when we shopped for one.  In plain English, that means there's a fan inside the oven that circulates heat evenly.  We originally ordered a GE Profile range but three weeks of waiting and I threw the towel in.  I'm very happy (so far) that we ended up with this Samsung one which is as much of a beauty as it is a beast - plus when we bought it, we saved $1,000 smackeroos!  Maybe someday I'll get to write a full length review of the Samsung NX58H9500WS, but right now, it has to suffice that I am in love with this appliance.  Proof?  A deliciously and perfectly cooked tarte tatin baked in twenty five minutes flat!
But I digress.  I had yesterday off and I did some work in the garden which I've been putting off for a while now.  I yanked out the tomatoes, peppers, basil and zucchini but I was pleasantly surprised to see that so much of my garden herbs are still thriving - including the cilantro and parsley, which supposedly don't like hot summers like the one we had.

Tip: I planted them behind the tomatoes so they get a lot of shade, and apparently, it worked!

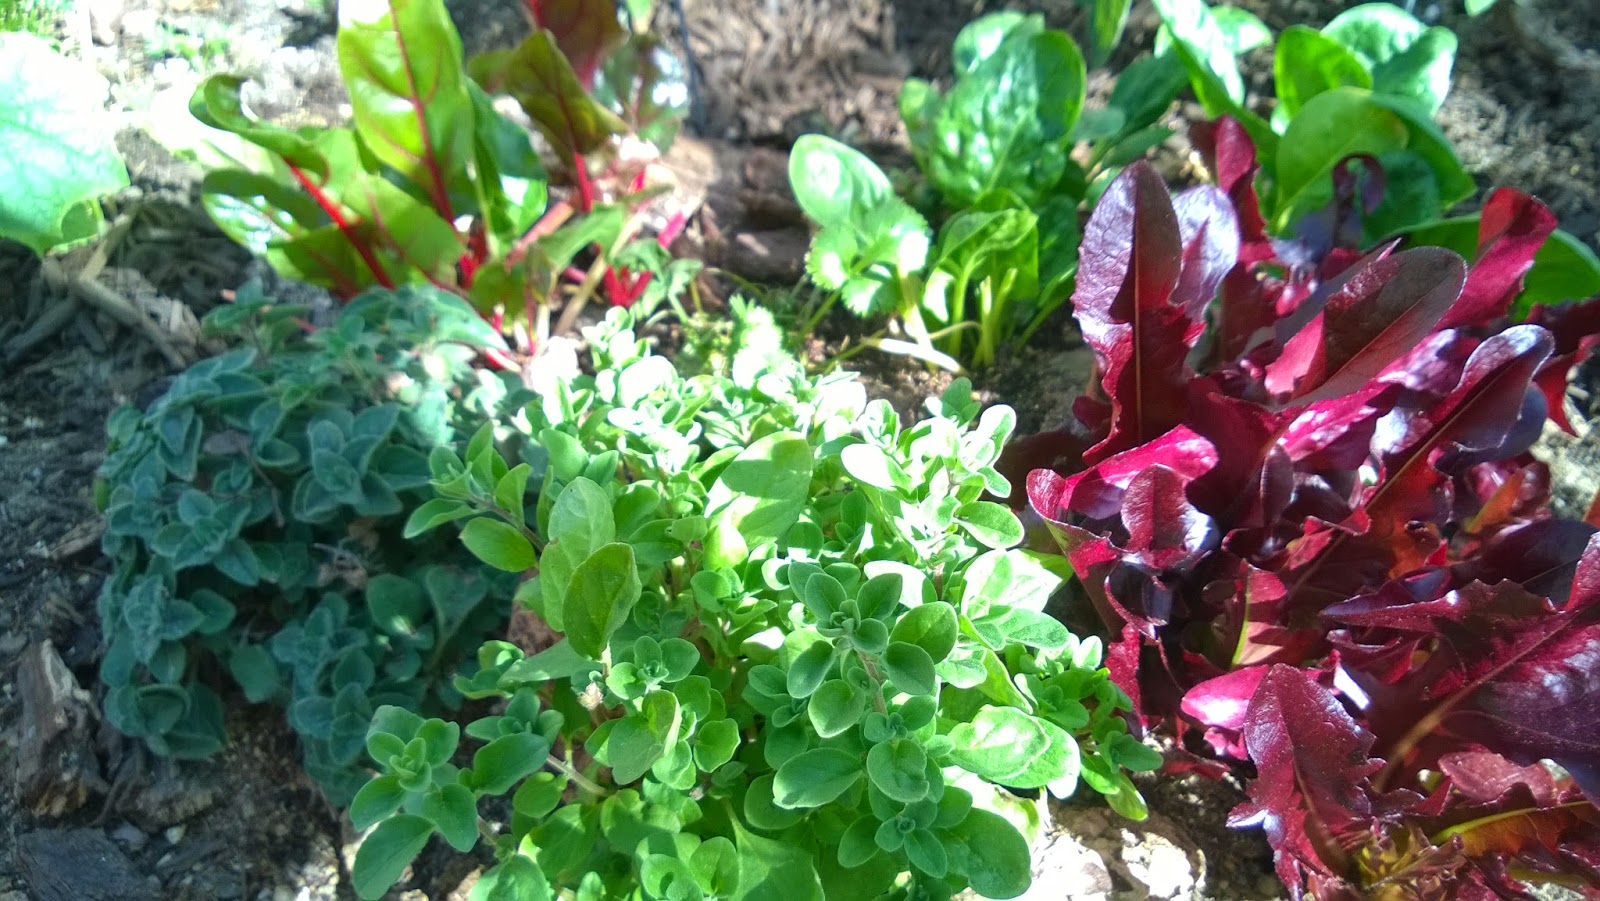
Here are five of my garden herbs that have outlasted summer in higher than average temperatures and little water (we're in a drought, people).  I've had them in the ground since spring and it is really gratifying to see them still alive and best of all, able to provide with cooking herbs this late in the season.
1.  Parsley
2.  Cilantro - even I was surprised!
3.  Oregano
4.  Rosemary.  Like thyme below, rosemary is perennial so it is very hardy and should live all year long.  Also, did you know that ragu bolognese uses rosemary as its main herb?
5.  Thyme

Bonus Round
I had picked up these herbs a few weeks ago and I've been trying to keep them alive indoors.  Herbs grown indoors are never quite the same as the ones grown outside and since I was already outside, I went ahead and transplanted them outside.  Because these are hardy-slash-frost resistant, these will have a few weeks left in them, as long as winter doesn't sneak up with a deep freeze.

1.  Sage.  I better get on with that saggia e burro we tried in Tuscany last May.
 2.  Lemon Mint.  Pan grilled courgette or squash,  with olive oil, mint, a drizzle of lemon, a crack of red chilli pepper - perfect fall vegetable dish!
And speaking of which... I gotta go make this right now!  Hope everyone's having a great autumn!

Sunday, May 4, 2014

Cartwheels in the Garden - Mid Spring Edition

What's "growing" on?

I can't believe it's already May. Can you? The days are warmer and longer - perfect for all things outside! I'm getting exponentially darker by the day between gardening and mountain biking (oh yes, I did, but more on that another time!).  Time is going way too fast nowadays, but I personally don't mind since that just means more fun outdoors - and more food in the garden finally.

We've been eating from the garden already, although there wasn't enough yet to be totally off the grid. I had some rabbit issues (again) this spring that decimated some early seedlings. But I am catching up!
Snap peas grow in a snap!
Vivian Lettuce - these things grow forever.  If you have impatient in you, I wouldn't grow this variety from seed

Parsley is a mainstay in our kitchen so this one has been harvested more than the others. 
Swiss chard which we've already been harvesting off and on for omelets and salads 
Carrots and sugar beets that were grown from seed
Kale - of course!
Mesclun lettuce - now THESE grow amazingly fast and they're eager germinators!
Some more (red) mesclun, spinach, marjoram and oregano
Radish - one of the easiest and fastest growing spring crops

Cauliflower with leaves bigger than my hand.  No cauliflower sighting yet, but these need to get big before they start producing
The strawberries are going crazy already.  Like rabbits, they're making babies fast and furious.  I started with one two year old plant and four baby seedlings last year.  As expected, the yield was not great, although they are the sweetest, freshest strawberries I've ever had.  In the late summer, we'd pick them right off the vine and snack on them.

Strawberries usually take a full year to root and become really gung-ho on production.  If this is your first year growing them, hang tight.  Good things come to those who wait!  I was out there today counting strawberry blossoms and I counted 80+ from the same five plants from last year.

I also learned that raspberries grow like weeds in our alpine desert climate.  I sweet-talked a co-worker into pulling me a cane from his productive raspberry (which he was happy to get rid off because he gets annoyed at how fast they multiply - imagine that!).  Supposedly, they grow in the crappiest soil and require very little maintenance.  Well not counting the number of times you have to yank out runners, I guess.  I put my adopted raspberry in the ground yesterday and it seems to be doing very well.  Because berries are expensive to buy at the store, they're one of the best things to grow at home.

I had a headstart on summer vegetables this year.  I started from seed on Valentine's Day and now, a couple of tomatoes are already grown and flowering!  I also have a handful of green beans already roaring. If everything goes well, I'll have tomatoes at the end of May - a first, especially in our climate!
Zucchini and thyme 
Two more tomatoes and more zucchini in the back
You might start thinking I have a huge garden space.  Well, I really don't.  All I have right now is one 42" x 42" raised bed and two self-watering containers, each has about 2 square feet of growing space.  Plus one dedicated bed for strawberries (which spread so I had to give them their own digs).  

Greenland Gardener 42" x 42" raised bed with a whole lot going on!
I may find out later that I have too much going on in this bed, but I'll be traveling soon so I needed to get all of my seedlings on the ground where they will be watered automatically by drip.  If anything, I can pull out those that look like they are being suffocated and transplant them later when I get back.  Also, the lettuces won't live through summer so more space should free up eventually.  

I never thought growing in the high desert would be possible, but three years into it and I am obviously and most certainly convinced otherwise!

Happy spring!

Saturday, April 5, 2014

Growing Pains: Lessons from the Garden #4

Yesterday, I woke up to this.


Before I left last week for New York City, I had slaved two evenings after my 9-5 fortifying a fence against my friends, the wild jackrabbits.  I had planted some spinach, kale and chard over a month ago now.  And now, they're gone.  Just like that.

It's hard not to get discouraged when this happens.  Actually, it's rather maddening.  When I was little, I never completely comprehended the animosity between Bugs Bunny and Elmer Fudd.  After three years of fighting with rabbits in my garden, I'm becoming intimate with that acrimony.

So I was in need of something cheerful today.

Hence...


The 2013 Banff Film Festival is on its annual world tour right now and last night, they stopped in town to an audience of 1,500 outdoor die-hards.  It is my second year catching this road show, and each time, I leave more inspired to chase dreams and to see more of the world.  One film called "Spice Girl" was about 20-something Hazel Findlay, one of the very few exceptional women climbers in the world.  There was a dramatic scene in the film where she was scaling a massive rock in Morocco, a point on the climb so challenging her fingertips barely grasping the crevice on the wall, and eventually, the wall would just crumble.  So she kept falling.  But she persisted and in the end, she made it to the top.

Well, this silly gardening business isn't anything quite earth-shattering like that, but the point is not to abandon that which you love doing the most, despite the challenges flung your way.  The drought in Western United States is projected to get worse in the next few months which will raise food prices by as much as 30% as reported by the Wall Street Journal.  I am passionate about clean, honest food and I will defend my right to garden against those rodents in my yard.

And what do you know?  Home Depot is running a "Black Friday" sale through April 13: adolescent seedlings (they're in 4" pots, bigger than sprouts, and thus less vulnerable to predators) for $2 a pop.  And some hardware wire for some more fencing for $6.  I could not pass up on this great deal!

I'm making wire cages all afternoon and these young guns are going in the ground.  Persistence!  

Thursday, March 13, 2014

Greenland Gardener Clear Cover Review

I have whined recently in another post how this winter has been underwhelming and atypical for the western part of the United States.  While the news reports of a polar vortex in the east and the midsection of the country, back here in the west, extreme drought looms over like an ominous cloud.  We usually get snow and freezing temperatures all winter-long.  This winter, I don’t remember it even come within the vicinity of freezing temperatures during the day since December.  Here in high desert, we depend on the snowpack from the mountains in the upper elevations for water.  This is the worst winter I’ve seen in three years and it is rather depressing, not just because I ski but because it is becoming more tangible that global warming is real and it is here. 

The silver lining, if any, is that the growing season can start early.  The silent but deadly question is –will there be enough water to sustain my garden in the summer?  But I suppose I’ll have to contend with that later. 

Our daytime temperatures have been consistently ranging from 50-60 degrees for more than 30 days now so that makes it pretty tempting for getting my cold crops, the hardy boys, out.  But it can still dip in the 20’s at night though, and that makes it tricky for growing anything just yet.  I'm sure they will live even when it gets cold, but will they grow?  

Enter the Greenland Gardener clear cover which cameo as a greenhouse-slash-cold frame.  It is a clear plastic tent-like frame that goes over a standard 42” x 42” Greenland Gardener raised bed garden kit.  It is used to create a physical barrier for your raised bed to trap heat in during the day and keep cold out at night.  This enables you to start growing as early as possible, to prolong the growing season - both equate to harvesting more out of your edible garden!

This is the clear cover as it shipped.
The clear cover installed over a 42" x 4" Greenland Gardener raised bed.
It has a zipper that allows you to regulate heat inside the cover.   

Below is a review I wrote of the Greenland Gardener Clear Cover for their raised bed kit.  The quick down-and-dirty:  I like it and if you already have a Greenland Gardener 42" x 42" raised bed kit, you should definitely have one of these!  If I had it sooner, I probably would have not had a problem growing kale, spinach, chard and lettuce all throughout winter.  But enough of these shoulda, woulda, couldas.  I will definitely experiment in the winter, but right now, spring is at the door. 


Spinach, kale, and chard could actually tolerate colder temperatures.  It has gone down to the 20's at night around here and even that did not cause these plants to flinch.  But to actually see for myself if a cold frame makes any significant difference, I planted two spinach, two kales, and two chards on the raised bed where I'm using the clear cover, and I planted two of the same veggies from the same pony pack on a container without cover.  The difference is rather noticeable.

This is the spinach planted under the cover.


And here's the one planted without the cover.

While they both survive nighttime freezing temperatures, I noticed that the one under the cover, seems to be more prolific and have bigger leaves.  Because of the insulation from strong-ish winds, the leaves of the one under the cover also seemed more intact than the one that's somehow splayed out on the uncovered one.

I am thrilled that I could have a rocking and rolling spring garden in just a few weeks.  I have some zucchini seedlings that I will experiment on to see if they survive the outdoors inside the clear cover and probably a Wall O' Waters.  It will be two months before frost-free weather is here, but I'm curious if it will work.  

Stay tuned!

Disclosure:  This post is a statement of independent opinion.  While I was sent the product to review as a sample, I did not receive any compensation from Greenland Gardener. 

Friday, March 7, 2014

How to Start your Seeds Indoors

I was at Home Depot today just nosying and I was reminded how expensive starts and seedlings can get.  The current market price for a small pot of non-organic, unhappy looking herbs was $3.97.  For one.  So if you're trying to build a garden, it can get very costly.  On the contrary, a packet of organic seeds containing more seeds than you probably need only costs $0.50-$2.  And right now, they're buy one, get one free!


They key to starting a garden from seeds though is starting early.  It's probably too late to start your broccoli, kale and chard from seed now since those take longer to grow.  But if you're in the West Coast where it's been uncharacteristically warm, you could absolutely sow beets, radishes, carrots now.  But you have to do it fast.

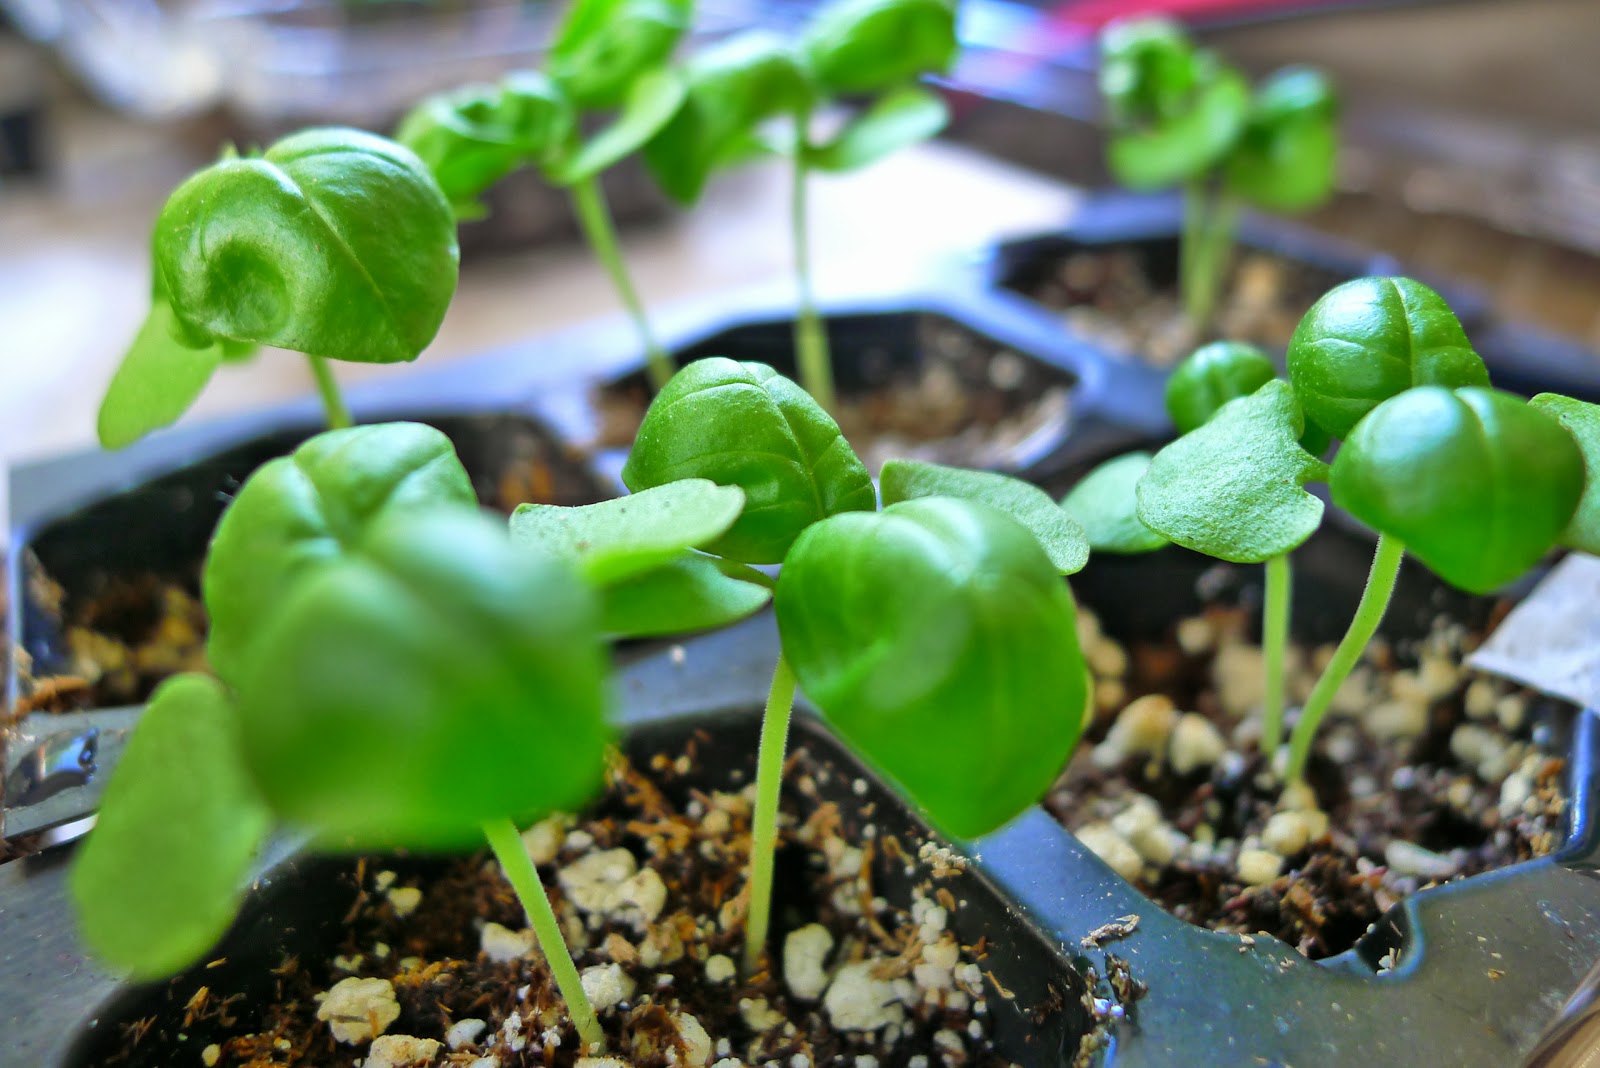
Warm weather plants like tomatoes, cucumbers, squashes, peppers, basil, etc. need to be started from seed indoors NOW.  Here are some practical tips on how to grow healthy plants yourself from seed.

1.  Source your seeds.  I buy my organic, non-GMO seeds from www.seedsnow.com .  I find that the starter pack for 99 cents is all I need.  The sprout rate is pretty high, too. You can also buy seeds at Home Depot or even your local grocery stores.  in fact, right now, Home Depot is running a buy one, get one free on all seeds.  Lastly, save your seeds!  Ate a tomato or a pepper you loved?  Save the seeds.  You just need to wash and dry them and they would be ready next season!  There are many YouTube videos on this topic.

2.  Use a soil starter mix of compost, coconut coir and vermiculite.  If you're familiar with square foot gardening, this is the mini-me version of what you would use in your outdoor garden.  If budget is not a consideration, you could also buy a seed starter mix at the nursery.  I cannot recommend anything they sell at the big box stores (in fact, I bought a Jiffy brand one to try and I'm returning it).  The one that I've tested and proven is Dr. Earth Root Zone that I bought locally at Moana Nursery.  I especially like it since it is infused with a whole bunch of organic compost and magic ingredients and it's formulated with mycorhizae, a beneficial microbe that promotes healthy root growth.  I used this last year with great success.  Some recommend to use coir pellets which are those round objects made of peat moss or coir that expand when submerged in water.  I've used them before but the ones I grow without do just fine.

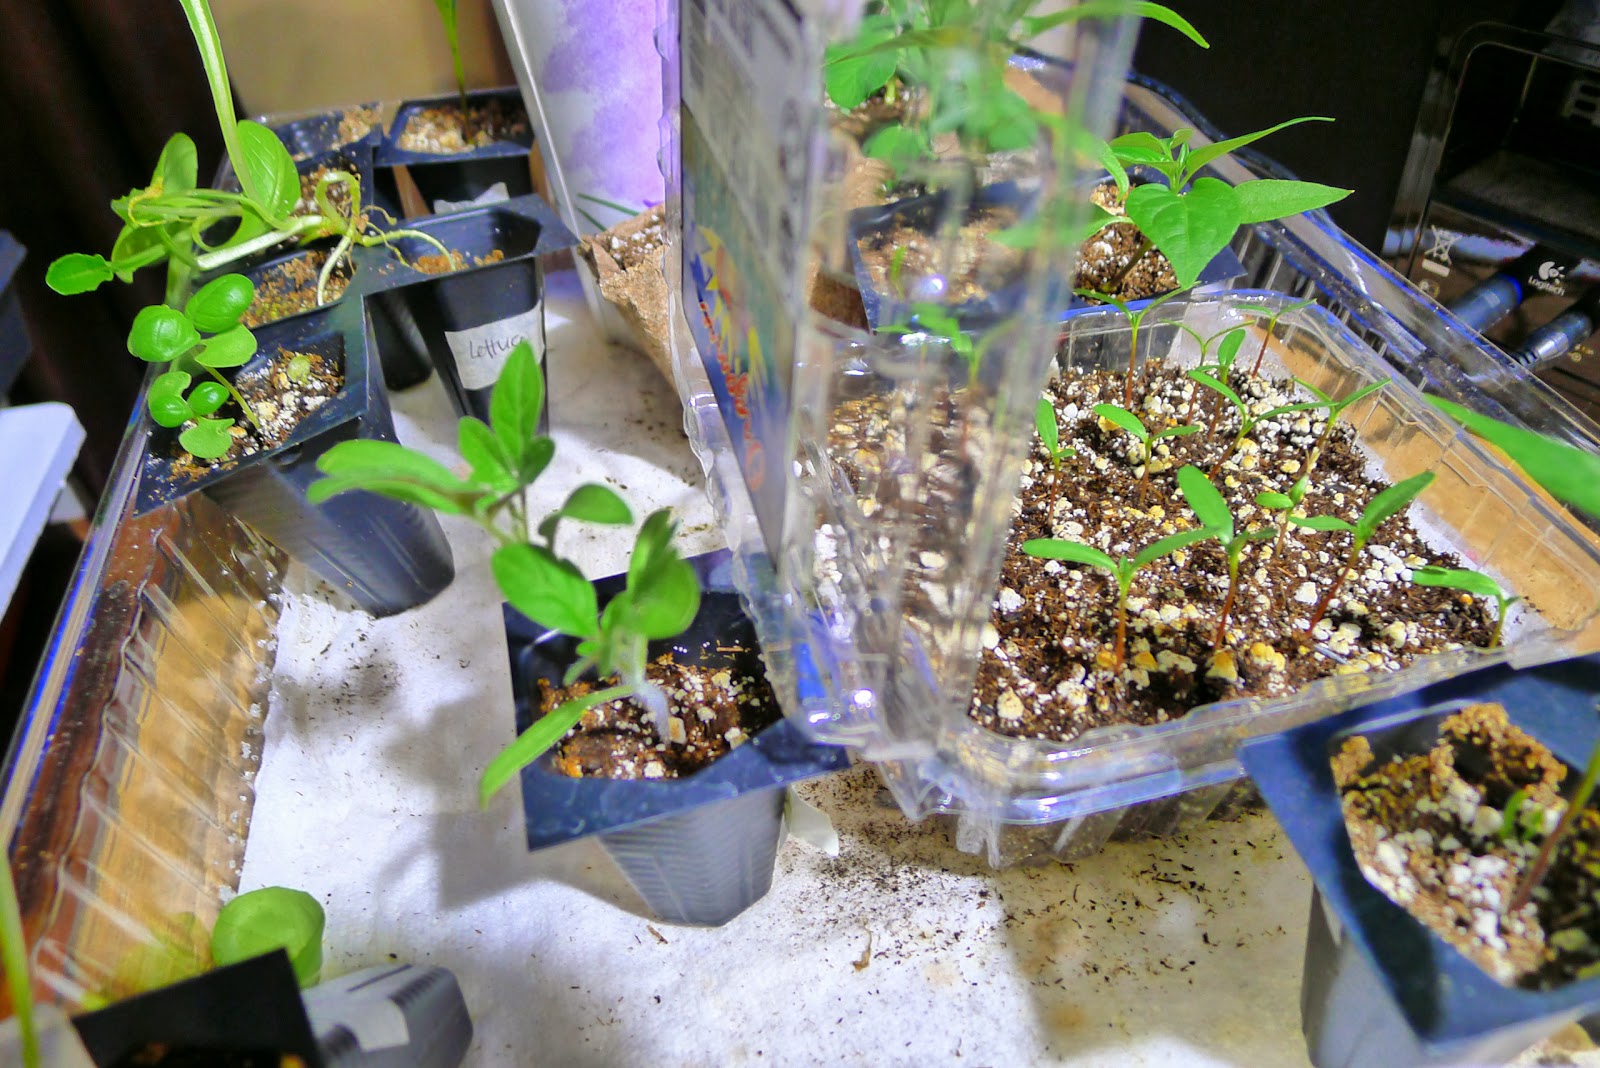
3.  The purpose of seeds is to propagate life.  I think I can say with confidence that desire to live and thrive.  Given the right environment, it shouldn't take too much.  To grow seedlings, I have used plastic seed starter trays and biodegradable paper containers with success.  I also like recycling and I've grown seedlings in recycled tomato plastic containers which work great because they have covers.  Make sure though that they are deep enough for your seedlings to take root.


If you are on Pinterest researching ideas, I discourage using egg cartons.  It is a cutesy idea and the intention is good, but it's just not deep enough to promote root growth.  Look at the root hanging from a week-old seedling:


4.  A dome on top of your unsprouted seedlings give it the heat or the "greenhouse effect" the seeds need to sprout.  I've bought a plastic one last year and I'm reusing it this year.  Salad or tomato containers with lids work great, too.  I've wanted something more aesthetic and pleasing so I invested in this Ikea Socker greenhouse which I've had for three years now.  They work great and look pretty, too!


They say the ideal temperature is in the 70's (fahrenheit) so if you're starting seeds in the spring, you might want to position it in a warm part of the house.  I've heard people say the top of the refrigerator is good enough.  I put mine in front of the gas fireplace (we have the pilot on all the time anyway) and it seems to be working well.

5.  Use a spray bottle to keep the soil moist, but not soaking.  Don't dry it out either.  Try not to get the leaves wet when watering.  As the seedlings get bigger, they would need to be watered from the bottom.  I travel a lot and I use these Vacation Mats that keep my seedlings hydrated for weeks while I'm away.  I wish it was a more organic, natural solution, but short of being tethered to these baby plants, I must make do.  I used them all last season and they worked great.


6.  Nerd it out.  Label your seed containers.  Especially when you're starting out, it would be helpful to know your tomatoes from your spinach.  These two grow in completely different seasons.  I also like keeping a journal of when the seeds did what.  It's like a baby book - in Excel.  Why?  I'd like to know what worked well and what didn't, what I grew and at what time.  For example, I looked at last year's journal and I noticed that I didn't start my seeds until April.  This year, I'm ahead and started them in February.  Hopefully by April, some of my tomatoes and zucchini will be big enough to plant outside with a Wall-o-Waters to protect it from the frost.

7.  Once the seeds have sprouted and woken up, you can have to leave the sprouts uncovered and you have to upgrade it to a sunny location.  This is the brightest spot in your house that gets at least 6 hours of sunshine.  If you read up, they say you can use grow lights to simulate the sun if you don't have sunny windows in the house.  I have never really needed to use lights since I have big windows facing south.  And I also won't pay for the resulting increase of fluorescent lights turned on for six hours a day in my power bill, thank you very much.

8.  Once the seedling has grown two pairs of true leaves (so that means six leaves, because technically, the first pair of leaves are not considered "true" leaves), you may need to transplant them to bigger digs.  I use paper party cups for these with the bottom trimmed and with a drainage hole at the bottom.  Empty ice cream pints also work.  Nothing fancy.  This is where they live until they're ready for prime time.


9.  When is prime time?  Depends on the type of plant.  Tomatoes, peppers, squash family and friends have to wait until nighttime temperatures no longer dip below the low 40's.  In high Sierra speak, that means typically after Mother's Day.  Your greens, kales, spinach, lettuce, broccoli can go as soon as they are big enough.  I've transplanted them outside without being hardened off thinking they thrive in the cold anyway, and they did just fine.

10.  Before transplanting outside, seedlings have to be hardened off.  What this means is that you gradually increase the seedling's exposure to outside elements - sun, wind, temperature - bit by bit.  Start out a couple hours in the morning, then bring them in.  The next day, incrementally increase the exposure time, but always bringing them in.  Towards the end, when you have a feel that the seedlings are big and strong enough, leave them outside overnight.  You'll be surprised the following morning that they've adjusted.  Go by feel, though.  Any time you see a seedling unhappy, wilty, droopy and such, bring them back in and ease up on the tough love.  They'll get there eventually.


What seeds would you like to grow this season?

Wednesday, March 5, 2014

Gardening in Raised Beds and Self-Water Containers

It's amazing how in such a small space, I could grow an inordinate amount of food.  Because I live in the high desert, it's almost imperative to use either raised beds or containers for gardening because our soil is predominantly clay, the type not suitable for gardening.

My garden set up right now is one 48" x 48" raised bed by Greenland Gardener and two self-watering planters.  I love the raised bed because of the sheer volume of food I yield from such a small space.  This Greenland Gardener bed is on its second year and despite the extreme temperatures here in the desert (including snow and deep freezes in December), it is holding up very well.  I wrote a review of this raised bed last season which you can find here.

See this small raised bed?


This is its realized potential...  It bursts with color and FOOD!


On the other hand, I also love the self-watering containers because here in the desert, it can get very frustrating knowing the right amount of watering required by your plants.  Self-watering containers, as its name suggests, regulates soil moisture by itself.  You just need to make sure the reservoir at the bottom is always full.  Self-watering containers when done right, could yield high volumes, although you can't plant too much on them since they tend to be small.  They also run expensive so when I see one on sale, I grab it!  Shown below is a City Pickers container I grabbed on sale and here's a review I wrote of the Grow Box.


This jalapeno plant on the City Pickers container kept growing and growing and producing and producing.  It was also the hottest jalapenos I've ever had and to be honest, I ended up giving away most of them because they were fatally hot.  


The other container had a melange of herbs, and in the spring, some lettuce that supplied us with salads all season-long.


I have not added any more beds or containers this year.  I can't wait to find out what this year would yield!